
Table of Contents
There’s something incredibly satisfying about creating a delicacy in your own kitchen. Imagine slicing into a perfectly cured and smoked piece of fish, knowing you crafted it from start to finish. Making cold smoked salmon at home isn’t just about the end result—it’s about the journey. The process connects you to an age-old tradition of preserving and enhancing flavors.
When you make your own smoked salmon, you gain full control over the quality and taste. Store-bought versions often lack the personal touch and freshness that a homemade recipe can offer. Plus, the process is simpler than you might think. With a few key ingredients and some patience, you can achieve a silky, flavorful result that rivals any gourmet product.
This guide will walk you through the basics, from choosing the right fish to mastering the art of salt curing and smoking. Whether you’re a seasoned cook or a beginner, you’ll find that making this delicacy at home is both rewarding and delicious. Let’s dive in and discover how to create a cold smoked salmon recipe that’s uniquely yours.
Introduction to the Art of Smoking Salmon
The art of smoking fish has been cherished for centuries, blending tradition with flavor. This method not only preserves the fish but also enhances its texture and taste. The combination of salt sugar, smoke, and time creates a unique flavor profile that’s hard to replicate with other techniques.
What makes this process special is its ability to transform simple ingredients into a delicacy. Unlike other preservation methods, smoking adds depth and complexity to the fish. The slow infusion of smoke creates a velvety texture and a subtly layered taste that’s both rich and satisfying.
Key ingredients like salt sugar play a crucial role in curing the fish, drawing out moisture and intensifying its natural flavors. The smoking stage then locks in these flavors, resulting in a product that’s both flavorful and tender. This balance of ingredients and technique is what sets smoked fish apart.
The process itself is straightforward but requires patience. From curing to smoking, each step builds on the last to create the final product. Whether you’re a beginner or an experienced cook, mastering this art is both rewarding and delicious. Let’s explore the stages that make this method so unique.
Understanding the Cold Smoking Process
Mastering the art of preserving fish through smoking opens up a world of rich flavors and textures. Unlike hot smoking, which cooks the fish, cold smoking focuses on enhancing its natural qualities. This method requires precise control of temperature and time to achieve the desired results.
Defining Cold Smoking vs. Hot Smoking
Cold smoking and hot smoking are two distinct techniques. Cold smoking is done at temperatures below 80°F, often for several hours or even days. This process preserves the fish without cooking it, resulting in a firm, silky texture. Hot smoking, on the other hand, cooks the fish at higher temperatures, typically between 200°F and 275°F.
Here’s a quick comparison of the two methods:
| Aspect | Cold Smoking | Hot Smoking |
|---|---|---|
| Temperature | Below 80°F | 200°F – 275°F |
| Duration | Several hours to days | 1-2 hours |
| Texture | Firm and silky | Flaky and cooked |
How Smoking Preserves the Fish
Smoking not only adds flavor but also helps preserve the fish. The combination of salt and smoke draws out moisture, inhibiting bacterial growth. This method has been used for centuries to extend the shelf life of fish while enhancing its taste.
To achieve the best results, monitor the temperature closely and ensure the fish is exposed to smoke for the right number of hours. Each piece should develop a rich color and firm texture, indicating it’s ready to enjoy.
Choosing the Right Salmon and Ingredients
The foundation of a great dish lies in the quality of its ingredients. When making this delicacy, selecting the right fish is crucial. Opt for king salmon or wild salmon, as their high fat content ensures a rich, buttery texture. These varieties are known for their superior quality and flavor, making them ideal for this process.
Once you’ve chosen your fish, the next step is understanding the role of salt and sugar in the curing process. Salt draws out moisture, preserving the fish and intensifying its natural taste. Sugar balances the saltiness, adding a subtle sweetness that enhances the overall flavor. Achieving the right balance is key to preventing spoilage and creating a standout result.
Ingredient quality is paramount. From the fish to the curing mixture, every component contributes to the final product. By starting with premium ingredients like king salmon and carefully measured salt and sugar, you set the stage for a dish that’s both delicious and memorable.
Preparing and Curing Your Salmon
Proper preparation sets the stage for a perfectly cured and flavorful result. The way you handle and treat your fish before curing plays a crucial role in the final outcome. This section will guide you through the essential steps to ensure your fish is ready for the curing process.
Cleaning, Deboning, and Trimming Tips
Start by rinsing your fish thoroughly under cold water. This removes any impurities and ensures a clean surface for curing. Use tweezers or pliers to carefully remove any pin bones, as these can affect the texture and safety of the final product.
Trim any excess fat or uneven edges to create a uniform piece of fish. This step not only improves the appearance but also ensures even curing. A well-trimmed piece allows the cure mixture to penetrate evenly, enhancing both flavor and texture.

Crafting Your Custom Cure Mixture
The cure mixture is the heart of the process, combining salt, sugar, and optional spices to season and preserve the fish. A common ratio is ½ cup coarse kosher salt to ½ cup raw sugar, but you can adjust this to suit your taste preferences.
Mix the ingredients thoroughly to ensure even distribution. This blend draws out moisture, intensifying the natural flavors of the fish while preserving its protein content. The curing process also helps inhibit bacterial growth, ensuring safety.
For a more personalized touch, consider adding spices like black pepper, thyme, or citrus zest. These additions can elevate the flavor profile, making your cured fish truly unique.
Remember, precision and hygiene are key. Handle the fish with care, and ensure all tools and surfaces are clean. By following these steps, you’ll set the stage for a successful curing process and a delicious final product.
Developing the Perfect Pellicle
Creating a pellicle is a critical step in the smoking process, ensuring your fish absorbs the perfect amount of smoke. This tacky coating forms on the surface of the fish, allowing the smoke to adhere evenly. Without it, the final product may lack the depth of flavor and texture you’re aiming for.
Drying Techniques in the Refrigerator
To form a pellicle, place your fish on a grate and let it dry in the refrigerator. This process typically takes 1 to 4 hours, depending on the thickness of the fish. Ensure the temperature stays below 65°F for optimal results. The cool, dry environment helps draw out moisture, creating that essential tacky surface.
Importance of the Tacky Surface
The tacky surface is crucial because it acts as a magnet for smoke. When you place salmon in the smoker, this layer ensures the smoke clings evenly, enhancing the flavor and texture. A well-formed pellicle also helps protect the fish during the smoking process, locking in moisture and preventing overcooking.
Using the right tools, like a pellet smoker, can make this process even more effective. The consistent heat and smoke from the wood pellets ensure your fish develops a rich, smoky flavor. By mastering the pellicle, you set the stage for a truly exceptional result.
Cold Smoked Salmon: Best Practices for Home Smoking
Achieving the perfect balance of flavor and texture in smoked fish requires precision and patience. The key to success lies in maintaining low temperatures and carefully monitoring the process. This ensures your fish develops a rich, smoky flavor without overcooking.
Maintaining Low Smoking Temperatures
Keeping your smoker at a low temperature is essential. Aim for a range between 68°F and 86°F. This prevents the fish from cooking while allowing the smoke to infuse gradually. Consistent heat is crucial for achieving the desired texture.
Use a thermometer to monitor the temperature throughout the process. Adjust the heat source as needed to maintain stability. This attention to detail ensures your fish remains tender and flavorful.
Timing and Monitoring for Ideal Texture
The time you spend smoking your fish directly impacts its texture. For cold smoking, plan for 12 to 18 hours. This slow process allows the smoke to penetrate deeply, creating a firm yet silky finish.
Check the fish regularly to ensure it’s developing a rich color and a slightly tacky top layer. This indicates the smoke is adhering properly. Avoid rushing the process, as patience is key to achieving professional results.
| Aspect | Cold Smoking | Hot Smoking |
|---|---|---|
| Temperature | 68°F – 86°F | 200°F – 300°F |
| Time | 12-18 hours | 4-6 hours |
| Texture | Firm and silky | Flaky and cooked |
By following these best practices, you can create a delicacy that’s both flavorful and perfectly textured. Regular checks and adjustments with your smoker will help you achieve consistent results every day.
Setting Up Your Smoker and Choosing Wood
The right equipment can make all the difference in achieving a perfectly smoked result. Whether you’re using a traditional smoker or a grill, the setup is crucial for maintaining low temperatures and consistent smoke. Let’s explore the tools and techniques that will help you succeed.
Types of Smokers and Grills to Use
There are several types of smokers and grills available for home use. Electric smokers are user-friendly and maintain steady temperatures, making them ideal for beginners. Charcoal smokers offer a classic smoky flavor but require more attention to control heat. Pellet smokers combine convenience with rich flavor, using wood pellets for both heat and smoke.
For those using a grill, you can convert it into a smoker with a few adjustments. Place a smoker box or foil pouch filled with wood chips on one side of the grill. This setup allows for indirect heat and smoke, perfect for delicate fish.
Selecting Mild Woods like Alder or Maple
The type of wood you choose significantly impacts the flavor of your dish. Mild woods like alder or maple are ideal for fish, as they provide a subtle, sweet smoke that enhances its natural taste. Alder is a popular choice for its light, buttery flavor, while maple adds a touch of sweetness and earthiness.
Avoid strong woods like mesquite, which can overpower the delicate flavor of fish. Soaking wood chips is not recommended, as it creates steam rather than smoke. Instead, use dry chips or pellets for a clean, consistent burn.
Setting up your smoker in a safe, well-ventilated place is essential. Ensure the area is free from contaminants and has proper airflow. Using a refrigerator during the curing process helps maintain a clean environment, preventing spoilage and ensuring food safety.
By choosing the right equipment and materials, you set the stage for a successful smoking operation. The combination of a well-prepared smoker and the perfect wood selection ensures your dish is both flavorful and tender.
Ensuring Food Safety and Quality Control
Ensuring safety during the preparation process is essential for a delicious and risk-free result. When working with raw fish, proper techniques and attention to detail are crucial. This section covers the steps to maintain safety and quality from curing to serving.

Proper Curing and Rinsing Procedures
The curing process is vital for both flavor and safety. Use a precise mixture of salt and sugar to draw out moisture and preserve the fish. After the curing period, rinse the fish thoroughly under cold water. This removes excess salt and sugar, ensuring a balanced taste.
Place the salmon cured on a rack to air-dry in the refrigerator. This step helps form a pellicle, a tacky layer that allows smoke to adhere evenly. Proper rinsing and drying are key to preventing spoilage and achieving the desired texture.
Handling and Storage Best Practices
Once the fish is ready, handle it with clean hands and tools to avoid contamination. Store the piece salmon in the refrigerator at or below 38°F to maintain freshness. For longer storage, wrap it tightly in plastic or vacuum-seal it before freezing.
When serving, pair your creation with a bagel and cream cheese for a classic combination. Always ensure each piece salmon is of high quality and safe to eat. Proper handling and storage practices guarantee a delicious and safe result every time.
Serving, Slicing, and Storing Your Creation
The way you serve and store your dish can elevate its enjoyment and extend its life. Whether you’re hosting a brunch or enjoying a quiet breakfast, presentation and preservation are key to making the most of your homemade delicacy.
Ideas for Bagels, Cream Cheese, and Garnishes
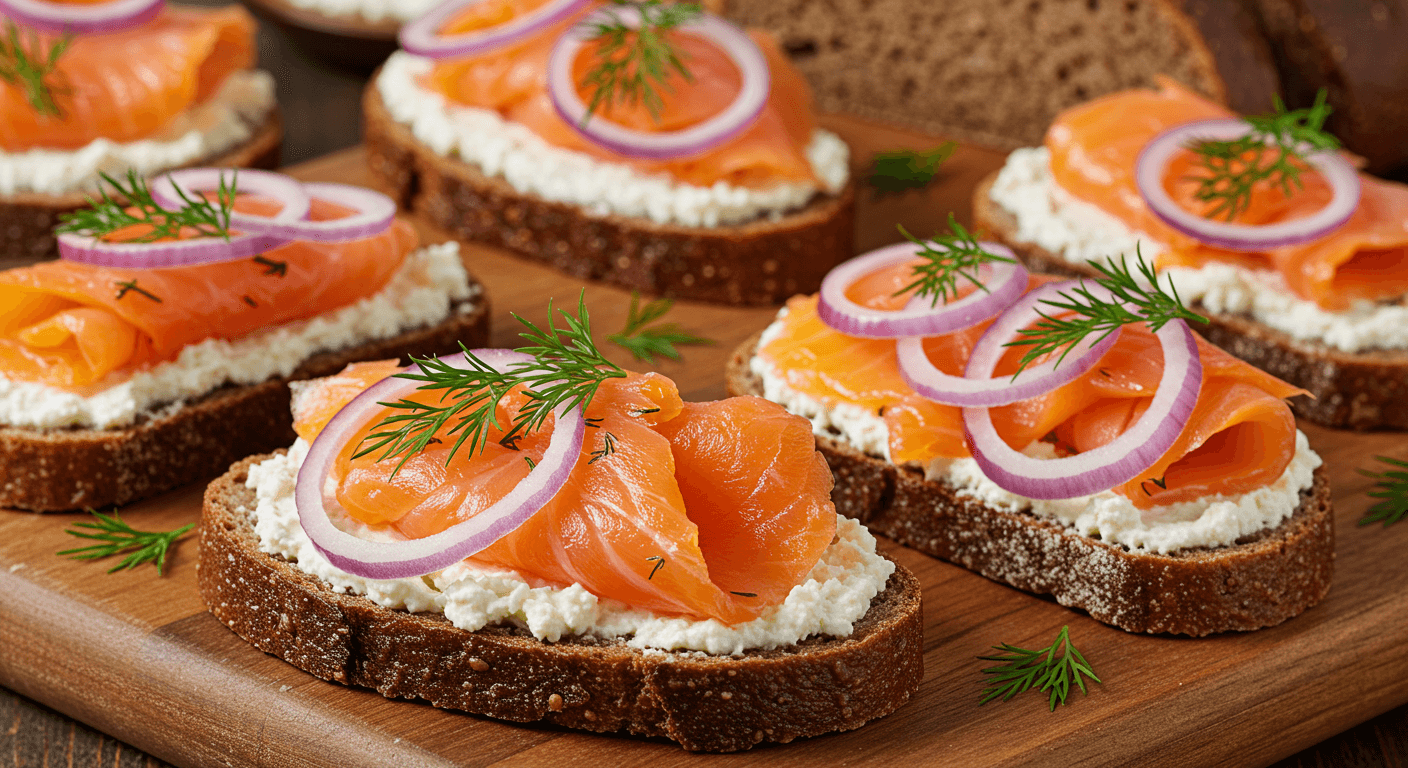
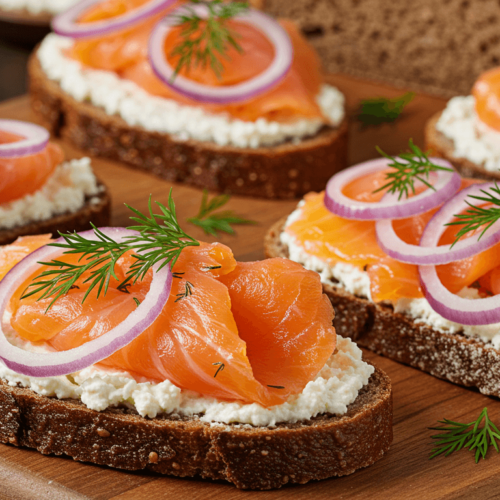
Pairing your creation with a bagel and cream cheese is a classic choice. Thinly slice the fish to make sure each piece reveals its velvety texture. Add garnishes like lemon wedges, capers, or fresh dill for a burst of flavor. This combination creates a balanced and unforgettable meal.
For a more elegant presentation, layer the slices on a platter with avocado, cucumber, and a drizzle of olive oil. These additions not only enhance the taste but also add visual appeal to your dish.
Effective Methods to Refrigerate or Freeze Leftovers
To preserve its life, store your creation properly. In the refrigerator, wrap it tightly in plastic or place it in an airtight container. It will stay fresh for up to 2 weeks. For longer storage, freeze the fish in portions, ensuring it’s sealed to prevent freezer burn. Frozen, it can last up to 3 months.
When ready to serve, thaw it in the refrigerator overnight. This method helps maintain its texture and flavor, allowing you to enjoy it as if it were freshly made.
| Storage Method | Duration | Tips |
|---|---|---|
| Refrigerator | 2 weeks | Wrap tightly or use airtight containers |
| Freezer | 3 months | Seal in portions to prevent freezer burn |
By following these tips, you can prolong the life of your dish and savor it at its best. Proper storage ensures every bite is as delicious as the first.
Conclusion
The process of curing and smoking fish at home is both an art and a science. By using the right ingredients like brown sugar and kosher salt, you can achieve a perfect balance of flavor and texture. These components not only enhance the taste but also ensure proper curing for safety.
Feel free to experiment with the techniques covered in this guide. Whether you’re a beginner or an experienced cook, the results will be worth the effort. With practice, you can create restaurant-quality dishes right in your kitchen.
Explore more recipes and smoking techniques to expand your culinary skills. The journey of crafting your own delicacies is as rewarding as the final product. Enjoy the process and savor the flavors of your hard work!
How to Make Cold Smoked Salmon at Home
Equipment
- Pellet smoker
- charcoal smoker or modified grill for indirect smoking
Ingredients
- 1 lb fresh, high-quality salmon fillet (skin-on)
- ½ cup cup coarse kosher salt
- ½ cup raw sugar
- 1 black pepper, 1 tsp dried dill, or citrus zest Optional
Instructions
- Cure the Salmon:Mix salt, sugar, and spices. Coat the salmon evenly.Refrigerate for 12–24 hours to draw out moisture.Rinse & Dry:Rinse off the cure and pat dry. Air-dry in the fridge for 1–4 hours to form a tacky pellicle.Cold Smoke:Smoke at 68–86°F (20–30°C) for 12–18 hours using mild wood (alder/maple).Monitor temperature closely to avoid cooking the fish.Serve/Store:Slice thinly against the grain. Serve with bagels, cream cheese, or garnishes.Refrigerate for up to 2 weeks or freeze for 3 months.
FAQ
What’s the difference between cold and hot smoking?
Cold smoking uses low temperatures (below 90°F) to add flavor without cooking the fish, while hot smoking cooks the fish at higher temperatures (above 120°F).
How do I choose the best salmon for smoking?
Opt for high-quality king or wild salmon with firm flesh and a fresh, ocean-like scent. Avoid fish with a strong fishy odor or soft texture.
Why are salt and sugar used in curing?
Salt draws out moisture and preserves the fish, while sugar balances the saltiness and enhances flavor. Together, they create a perfect cure.
How long should I cure the salmon?
Typically, curing takes 12-24 hours, depending on the thickness of the fish. Thicker cuts may require more time to fully absorb the cure.
What’s a pellicle, and why is it important?
A pellicle is a tacky surface that forms on the fish after drying. It helps the smoke adhere better, enhancing flavor and texture.
What’s the ideal temperature for cold smoking?
Keep the temperature between 68°F and 86°F to ensure the fish smokes without cooking. Use a thermometer to monitor consistently.
Which wood is best for smoking salmon?
Mild woods like alder or maple are ideal. They impart a subtle, sweet flavor without overpowering the fish.
How do I store smoked salmon after preparation?
Wrap it tightly in plastic or vacuum-seal it. Store in the refrigerator for up to a week or freeze for longer preservation.
Can I use a regular grill for cold smoking?
Yes, but you’ll need a cold smoke generator or a separate smoke box to maintain low temperatures and produce consistent smoke.
What are some serving suggestions for salmon?
Pair it with bagels, cream cheese, capers, and red onions. It also works well in salads, pasta, or as a standalone appetizer.